


Hey guys.. How’s the country treating you? I hope it’s not so bad.
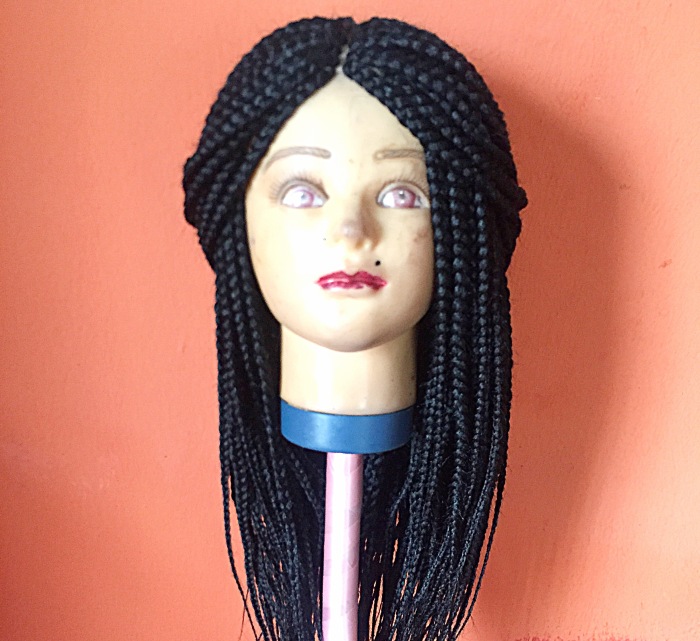
As the title of the post suggests, I’m sharing a much easier method of making your own lace closure for your braids wig like I talked about in the first tutorial post I did. If you haven’t already read that post, you should check it out as I won’t be repeating the basics here but just showing you how you can make the lace closure for your braids wig in a much faster way while still getting the same result.
 This method is an affordable alternative to using a ventilated human hair lace closure for your wig and will guarantee a neat looking closure. Although there are other methods such as the latch-hook method which I might be sharing soon. So keep reading to find out how.
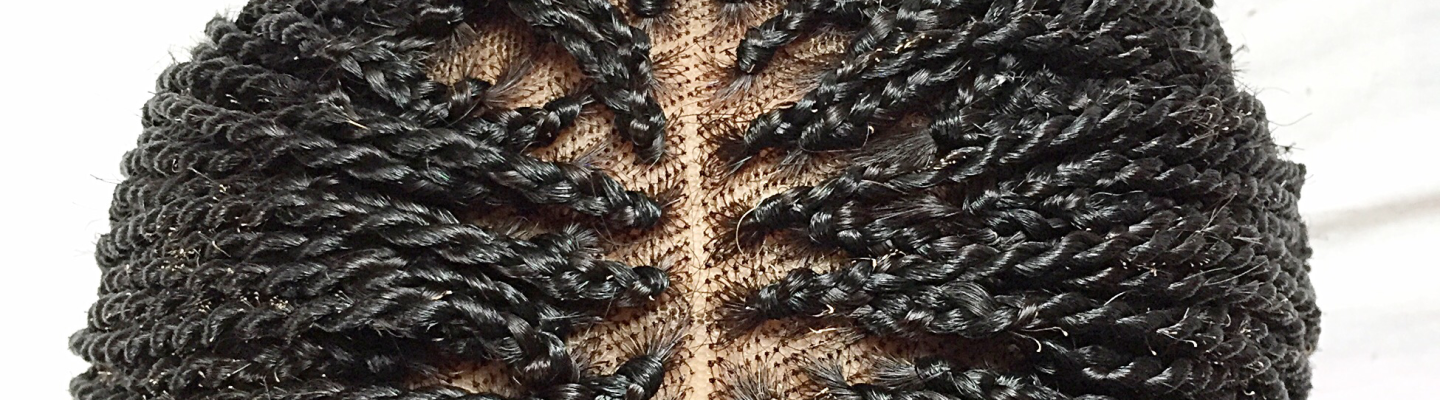
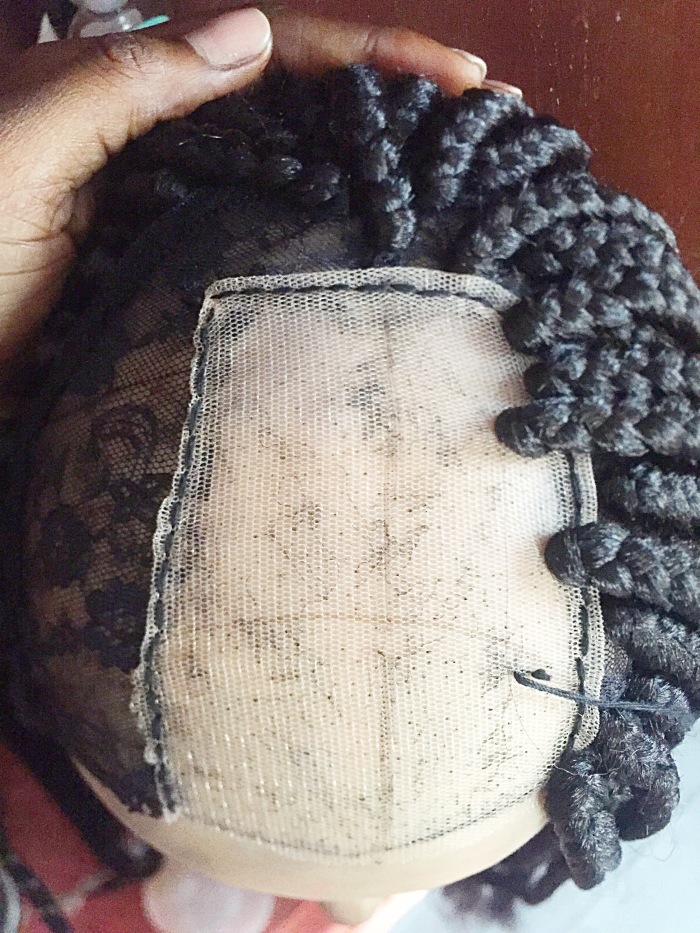
– First step is to sew down the lace you’re using on the wig cap. For those who’ve been asking, the Swiss lace is popularly used to make lace closures. But since we aren’t ventilating, you could use a good alternative such as the Veil net like the one I used in this post.
– Using this method, you would pass some thread through a large needle (I doubled the thread twice to make it thick) knotting the ends.

– Pass this through the lace, then take the piece of attachment you want to braid and attach it to the lace by passing the thread over it a couple of times for security and tie a knot.
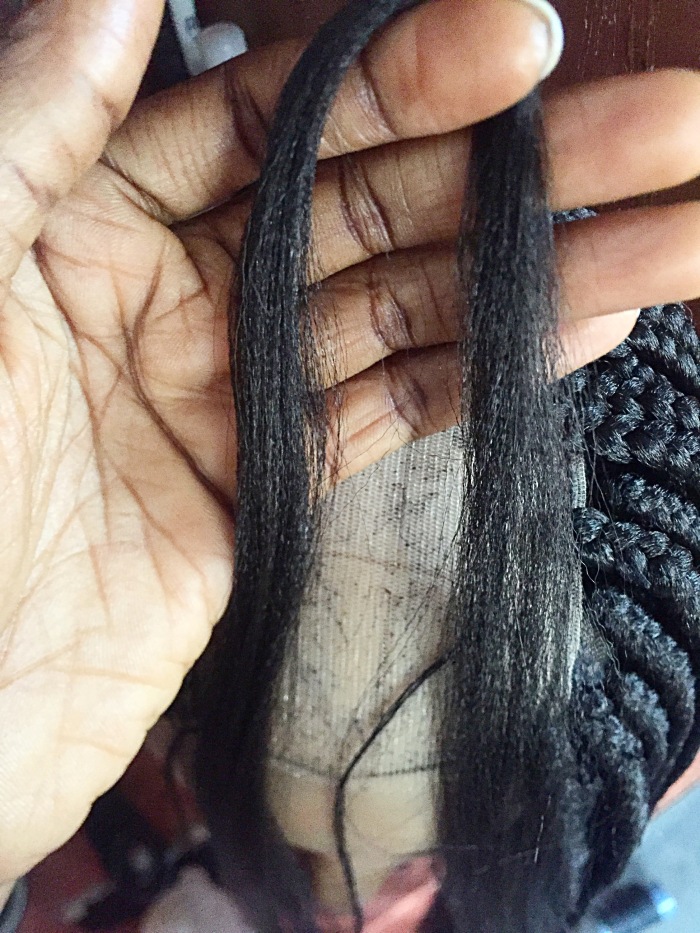
– Cut the rest of the thread but make sure to leave little thread after the knot.
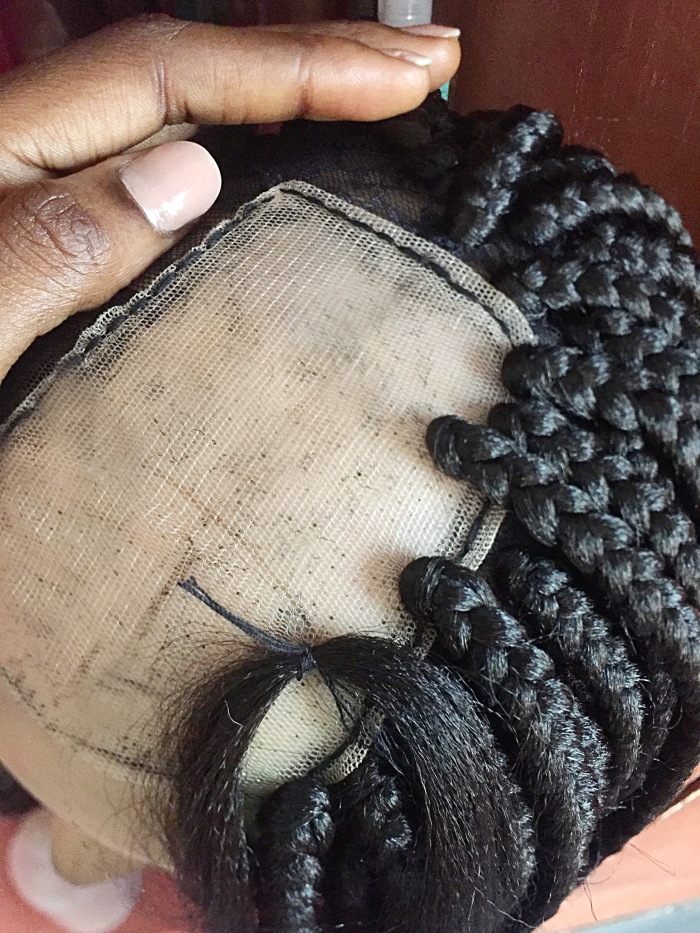
– Take some more extension and start braiding or twisting the it along with the thread you didn’t cut. This is probably the most important part of the process. Braiding the extension with some thread at the beginning ensures that the knot doesn’t loosen and the braids don’t start falling out. Trust me I learnt this the hard way..

– Braid the hair till the end and repeat the process till you’re done.
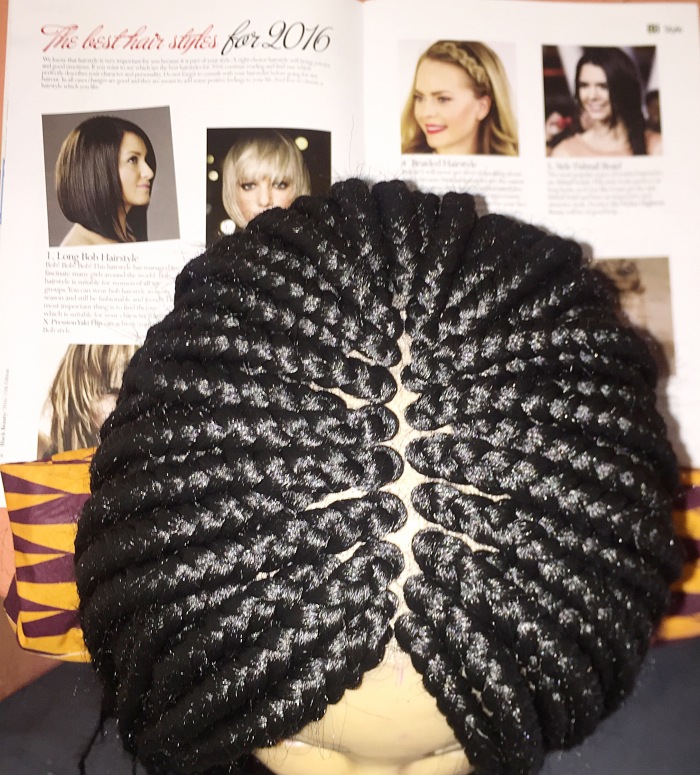
This method is really easy as well as secure. It also ensures that the lace doesn’t rip which is very important. I use this for clients who don’t purchase the ventilated lace closures. Some people who don’t know have asked what the difference is because from a distance, it looks pretty much the same. As always, I’m here to provide more affordable alternatives to growing healthy hair on a budget.
The thread passed through one needle can be used for over 5 braids depending on the length of the thread so you don’t have to keep re-threading.

just throwing this in for good measure
Tips:
– Make sure to do a test by pulling on the braids to make sure they are secure especially if you’re doing this for a client.
– When you start braiding, start in such a way that the extension covers any thread that may be showing and trim off any nuisance lol.
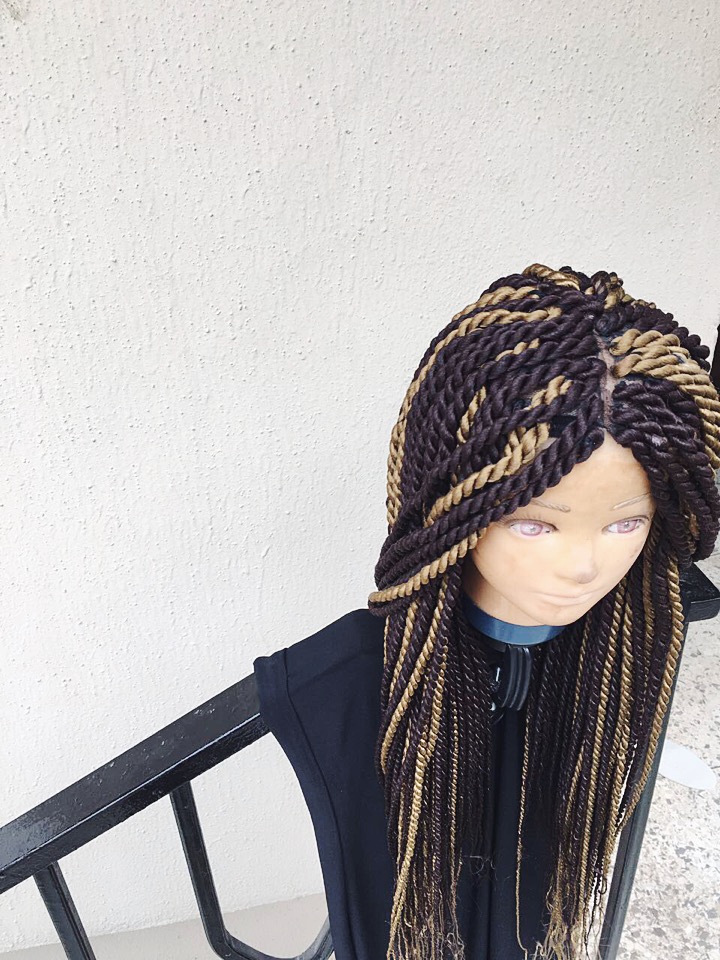
– You could use this method to make the whole wig and not just the closure. Saves more time than the one in my last tutorial. If you’re using coloured extensions, you could use that colour of thread if you’re worried about the thread showing at the root of the braids.
– When purchasing the lace for the closure, choose a color that’s close to your skin tone so it won’t be obvious or you could purchase a wig cap that comes with lace at the front. It works just fine.
Again, there’s other methods to make a braids wig that I may just keep sharing. Remember if you have any question, drop a comment or send me a mail.
You can place an order for wigs or wig making materials such a wig caps, clips etc also by sending me a mail or message on my Instagram business page @budgetbeautyhair. I’ll be telling you more about this soon.
By the way, this blog will be a year old really really soon and although I’ll love to make a very detailed posts on all the joy I’ve gotten from blogging and how it’s changed my life, I may not have the time. But there’s definitely time for a give away that I’ll be announcing on my Instagram page @naturalgirlonabudget. So please follow me and stay updated. You don’t want to miss this.
Drop a comment for any tutorial you want to see on the blog.
Love… Ella

Very detailed tutorial. Thanks for sharing.
The closures look really neat, like the Swiss lace.
LikeLike
Thanks for reading..
LikeLiked by 2 people
Thank you so much for sharing this!
Definitely trying this out during the weekend 🙂
LikeLike
Anytime Hun.. Please show results!
LikeLike
Looooool, hair isn’t our calling we would leave the jobs to the gurus.. Amazing job hun💋💋💋
LikeLike
Lool Serah baby..
LikeLiked by 2 people
Very detailed tutorial.
I’m still expecting my braid wig 😁😁
LikeLike
Coming through honey!
LikeLike
Can you help with the supply of the materials needed
LikeLike
Trying this out very soon. Thank you so much for sharing
LikeLike
The wig is very natural looking. You did a great job. Nice tutorial.
LikeLike
Thank you and thanks for reading..
LikeLiked by 1 person
You’re welcome
LikeLike
Good job Ella,this method is really neat and fast.I use this method too,welldone!!!
http://www.stylehairven.com
LikeLike
Thank you dear.
LikeLike
Very neat and beautiful, please could you also share a tutorial of how to do the wig using weavon??
LikeLike
Thank you. I’ll definitely do that soon.
LikeLiked by 1 person
Wow..very detailed tutorial.. How long did this take you to achieve?
LikeLike
Just the closure area takes a couple of hours maybe 3. The full wig about 2-3 days..
LikeLiked by 1 person
Pingback: DIY: How the make a lace closure for your braids wig (Threading method) – NAIJA NATURALS
Thanks for sharing hun. I don’t really think I’m talented to try this but as I have always said, I will order one from you soon.
08100550000
LikeLike
Aww. No problem I’ll hook you up!
LikeLiked by 1 person
well done! its really beautiful. would definitely try mine out. if i may ask’ how much would i get a wig cap for?
LikeLike
Thank you so much. 800-1000 Naira.
LikeLike
Nice one. Thanks please keep them coming God bless
LikeLike
Amen. Thanks for reading!
LikeLike
Please can I use the wig cap they use to make skull cap? An use basic net material material front?
LikeLike
If you’re referring to the stocking cap, I don’t think so because it’ll end up ripping! Any lace material that won’t tear or rip should do the job. Thanks for reading!
LikeLike
Wow, I will definitely try this method thanks for sharing,pls what the name of the wig cap and how many packs of attachment did u use
LikeLike
can i use any colour of lace
LikeLike
Hi. I am a first time commenter but if I can ask, can we talk on phone…if yes sms me on 07038733662. Thanks.
LikeLike
Hey great post, v informative. please where can I get the lace ?
LikeLike
This is an awesome job. Please share in Lagos, where I can purchase the lace material used for the closure from.
LikeLike
Very detailed post, thanks.when u said veil net,do u mean the type tailors use in sewing
LikeLike
Swiss lace but that could work too..
LikeLike
thanks a lot. God bless you.
please how can one get the veil net for closure.
LikeLike
Tailoring supply store..you’re welcome
LikeLike
A very detailed post, please what can one use to secure the wig cap from pulling off ? if i am to use elastic, how do i sew it to the cap (weaving cap) and do i also need to sew it to the lace i. e the elastic. Thanks
LikeLike
thank you Ella for making this process so simply
i really hate sitting down and braiding
but wif this i dont think i ll visit d salon dat much
LikeLike
pls a tutorial on how to do short hair fringe, tankx.
LikeLike
Nice job dear, i want to know if crochet pin could be good for the job
LikeLike